
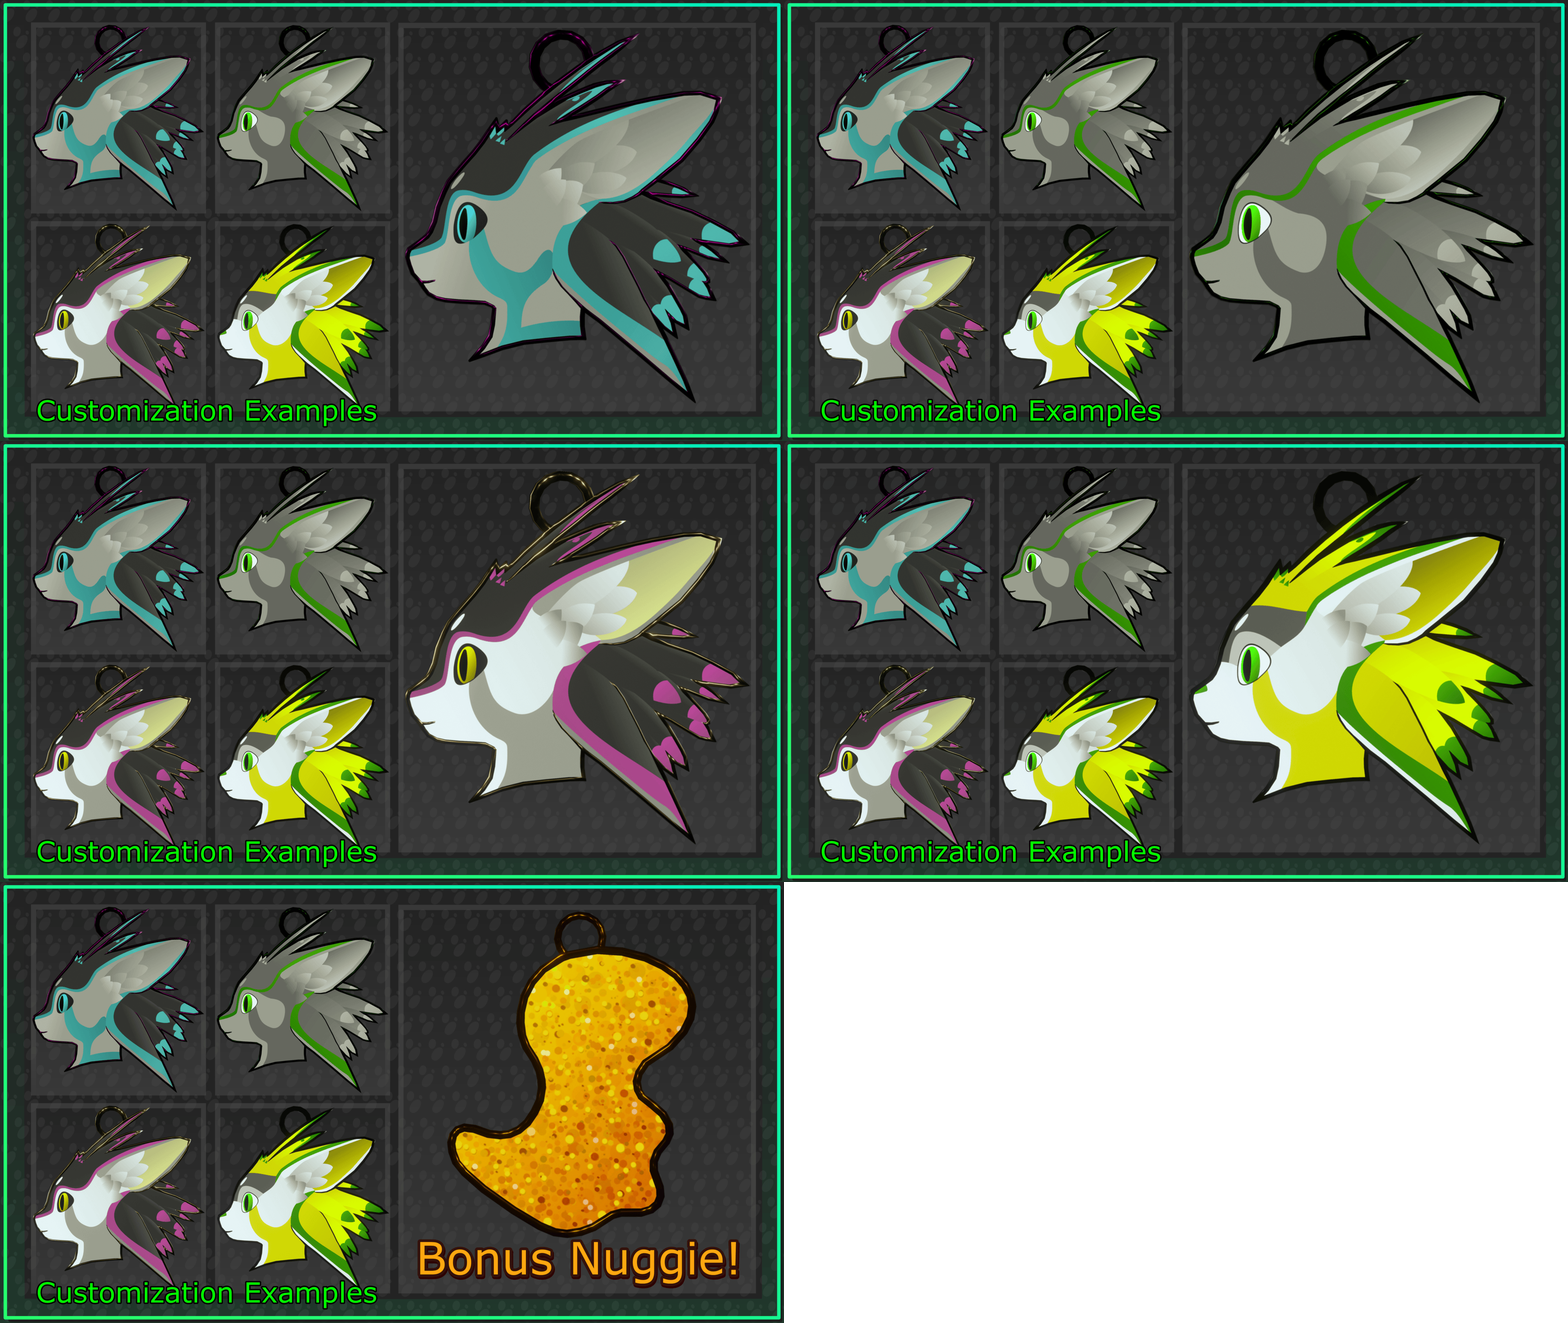
Product Description
Have you ever wanted to get a custom tag of you or your loved one's?
This kit allows you to easily build and customize your own tag with display of an Avali in shape of Spiri'vali by Hiyu!
Installation is relatively simple - import .unitypackage file, attach the prefab to a bone you want it to attach to, usually it would be existing collar tag bone, on your ear, off your bag, as a belt buckle, on a ring or even as a patch!
As of now I did not make a collar to include, but you can find many free options around Jinxxy or other marketplaces
Customization options include a selection of multiple face bases, face patterns and other options separated in layers to allow easy basic and fine adjustments through hue shift and other filtering options in any photo editor application (Krita, Gimp, Paint.net, Photoshop, or other apps available offline or online like Photopea), more details explained further down below
Prerequizites
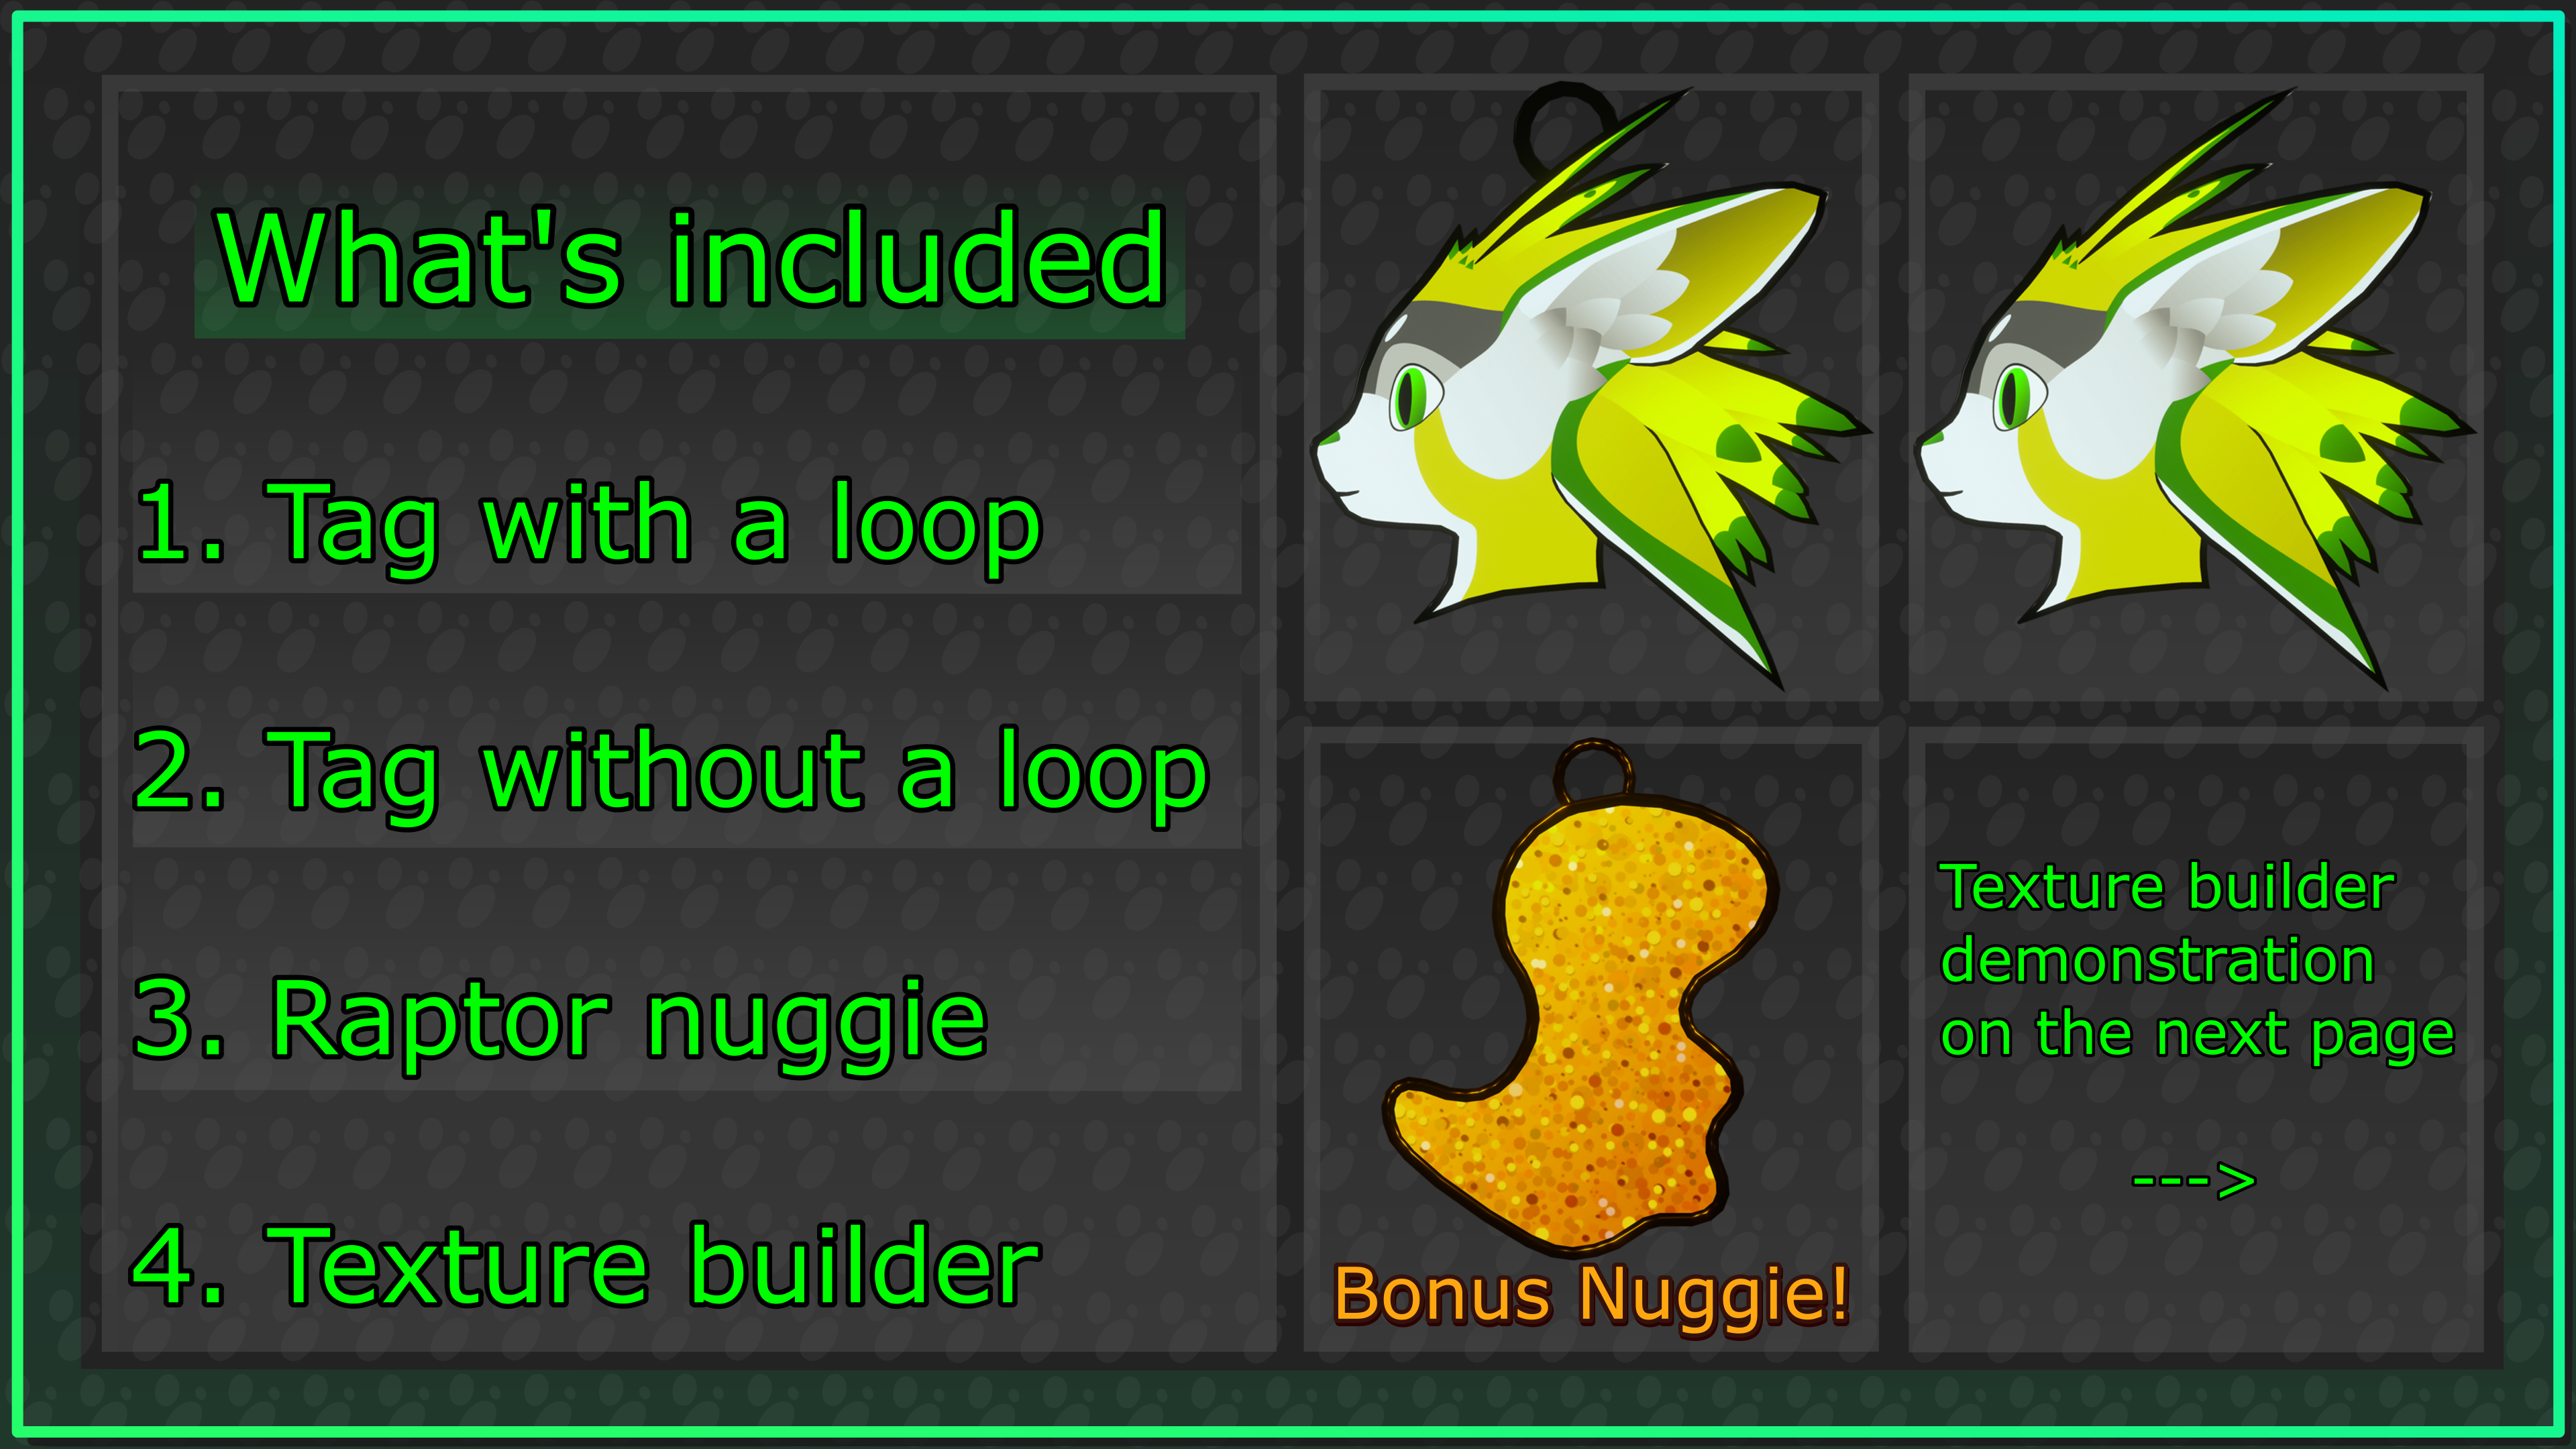
What's included
- Unitypackage files of Spiri'vali pendant with and without a loop with included Poiyomi material and VRCFury presets (.unitypackage)
- Blender and FBX files of Spiri'vali pendant with and without a loop (.blend and .fbx)
- Krita and Photoshop project file of Spiri'vali pendant containing a texture builder (a bunch of layers) for easy texture customization (.kra and .psd)
- 4K PNG files of all layers + PNG files of example textures you can see in first pictures
- Small bonus - Chicken Nugget in shape of a Raptor, also a tag (.unitypackage, .blend and .png)
Performance
- Spiri'vali tag - 1834 triangles, 1 material
- Raptor nuggie tag - 626 triangles, 1 material
While textures are generated in 4K I recommend reducing texture size to 1024 or below in Unity and using compression, this way it comes out as:
- Example 1 - PC Override - 1024, RGB Crunched DXT1|BC1 = 68.2 KB
- Example 2 - PC Override - 1024, RGB Crunched DXT1|BC1 = 69 KB
Basic Customization Instructions
(For simple step by step guide in Krita (free open source image editing and drawing application) see the section "Detailed Krita Instructions", you don't need prior knowledge of Krita, I'll explain exactly what you need to do)
Step 1
Build your own Avali through selecting applicable layers in editing program of your choice (apps like Krita, Gimp, Paint.net, Photoshop, etc., or other options available online like Photopea) by selecting layers of:
- Face base
- Face patterns
- Outlines
- Eye base
- Feather tips
- Additional features like forehead or nose patterns
- Etc.
Step 2
The base colour is set to green with idea to adjust hue, saturation and other visual values
You can customize colours by using either:
- Basic colour adjustments directly in Poiyomi shader settings (described in Step 4, meaning you can just skip current step)
- Editing it in a chosen image editing program if you know how (Krita instructions explained in the "Detailed Krita Instructions" section)
Step 3
- Before exporting make sure you have "Pendant frame colour (shade of metal)" layer visible
- Export final image in PNG/JPEG format, this is now your texture
Step 4
- Add texture file to Poiyomi material under [Color & Normals] -> Color & Alpha -> Texture
- You can adjust visual material properties in Poiyomi shader settings under [Color & Normals] -> [Color Adjust] -> Saturation/Brightness/Gamma or [Hue Shift], however note that tag frame colour will also be affected, so in this case it's best to select Silver or Black colour on "Pendant frame colour (shade of metal)" layer
Detailed Krita Instructions
After downloading and installing Krita you may open Krita project file "Spiri'vali texture builder.kra"
Step 1
On some side of the screen you should be able to find Layer Selection Menu: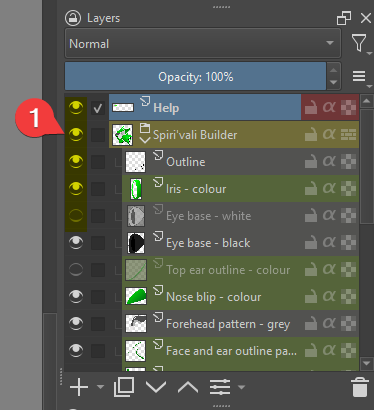 Eye icons (1) toggle layer visibility, go ahead and take a look what layers are available and select the ones that fit your Avali the most
You can disable "Help" layer if you like, it's not important for texture creation
Step 2
To adjust colour settings of individual layers I can recommend use of filters such as Hue shift, Saturation, Brightness, etc., note that hue shift works only with layers that have colour
For that you can simply select according layer and press [Ctrl+U] to open "Filter: HSV/HSL Adjustment - Krita" window:
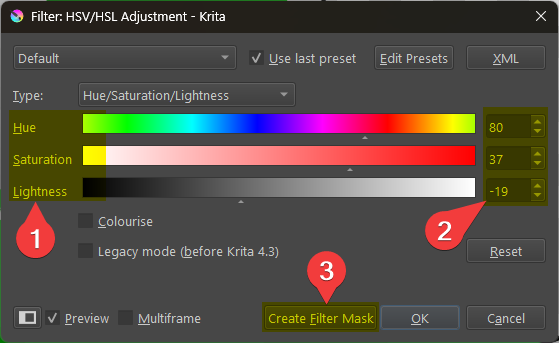 Adjust Hue, Saturation and Lightness (1) values and see what they do
Whenever you are happy with how your layer looks, I recommend copying exact numbers values that appeared on the right side (2) so you could reuse them on next layer you want to adjust
Click "Create Filter Mask" (3) to create a new separate filter layer which you can adjust or remove later without modifying original layer:
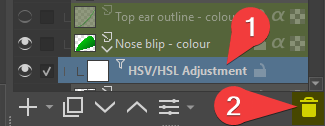 Delete filter with Trash icon (2) if you need to
Feel free to mess around, worst case you can just download Krita project again
Step 3
- Before exporting make sure you have desired "Pendant frame colour (shade of metal)" layer visible
- Export final image in PNG/JPEG format by following File -> Export...:
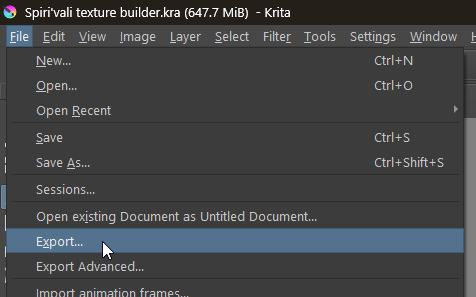 Choose a location, select file name and .png or .jpg/.jpeg file format when prompted
Then Krita will show you this popup which you can just skip, or adjust if you know what you like to change:
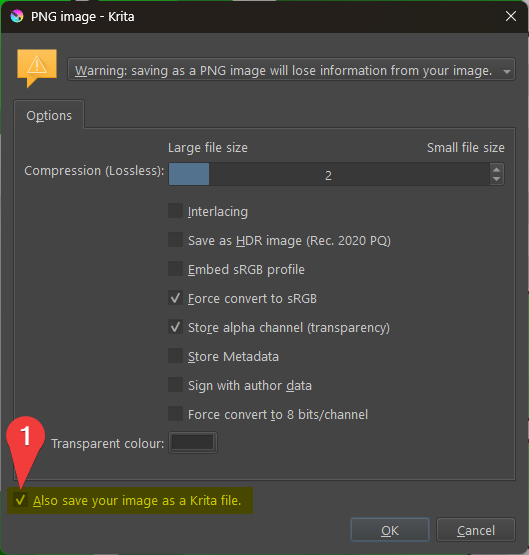 I can recommend unchecking "Also save your image as a Krita file." option before clicking OK to avoid creation of unnecessary krita duplicates.
Exported file is now your texture for Poiyomi
Before closing Krita I recommend saving with Ctrl+S
Step 4
Add exported texture file to Poiyomi material under [Color & Normals] -> Color & Alpha -> Texture