

Product Description
Requires Poiyomi and VRCFury to work as intended!
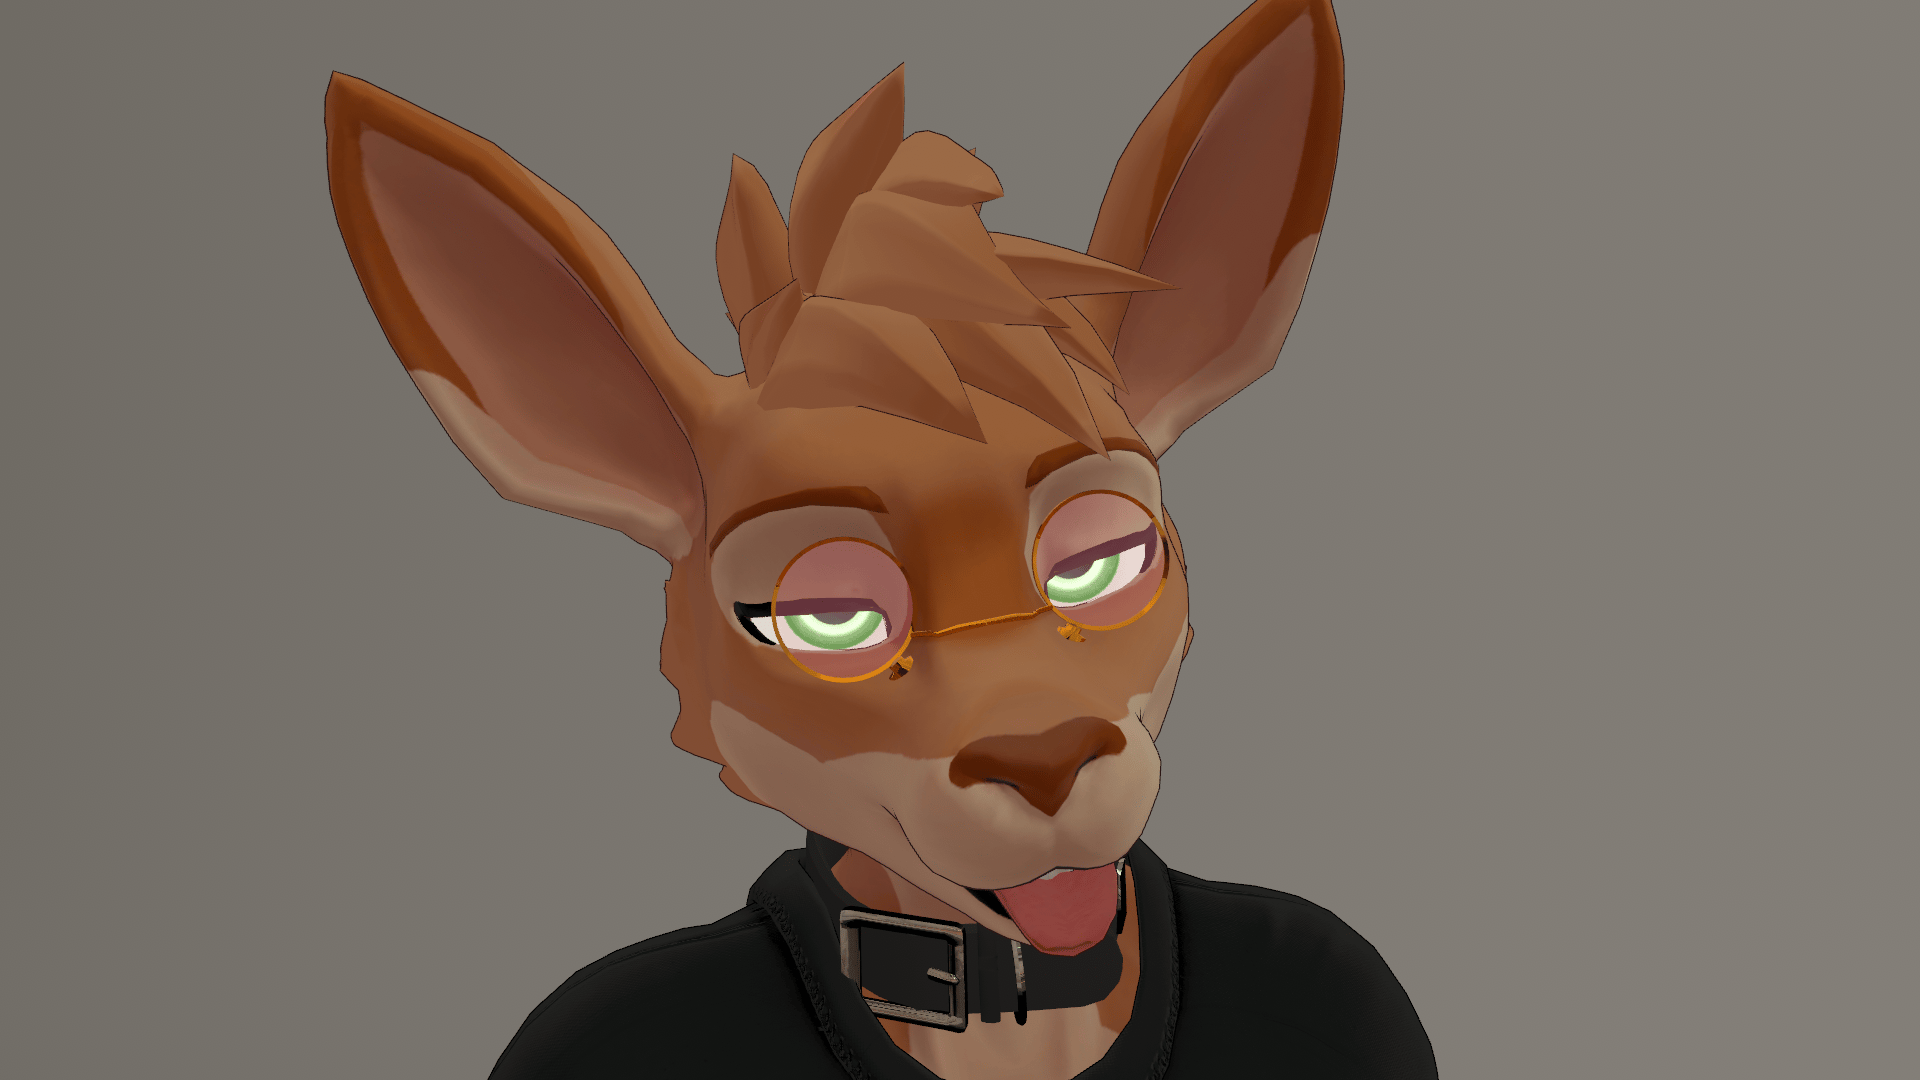
Regular glasses don't fit your avatar because your ears are like, way high? Here's a solution for you! These glasses should work so long as the bridge of your avatar's nose isn't extremely tall.
Pince-Nez Glasses for Avatars with Muzzles comes with:
- Color, transparency and emission sliders, plus hue shift speed!
- Blendshapes to adjust it to your particular face!
- Drag and drop simplicity!
Installation instructions if you already know what to do:
This prefab requires VRC Fury and Poiyomi Toon Shader. Drag the prefab into your hierarchy. It should work as-is. Adjust the size and position of the glasses using the pince-nez object. You can also use BlendShapes to adjust the fit of the glasses. Change menuing in the Toggles object.
Installation instructions if you don't know what to do:
- I need to assume you already have VRChat Creator Companion or a similar avatar manager and have made an avatar you already know how to upload. If you don't... do that first.
- For this file, you will need the packages VRCFury and Poiyomi Toon Shader added to your avatar project before you import.
- Drag the unity project file into your project under the Assets folder and Import.
- You will find the folder RGS, and Pince-Nez inside of it.
- Take RGS-Pince-Nez.prefab and drag it into the Hierarchy tab (usually situated on the top left, it's the one with the big list of items that appear in the Scene tab.) Place the prefab file onto the avatar that this will be applied to. It should appear underneath the avatar as a child folder.
- In the hierarchy, there is an arrow next to the prefab, click this arrow to open up the prefab's own children. You will see one object labeled pince-nez. Click this, and use the Move Tool in the scene window to place the glasses stop your character's muzzle, or where you please. You can also use the Scale tool to change its size.
- You can also make further adjustments to the glasses using Blendshapes. While you have pince-nez object selected in the Hierarchy tab, it should show you the object in the Inspector tab with the component called Skinned Mesh Renderer. Under this, you will see an item called BlendShapes. Click the arrow next to it to open up the list if it is not visible. You can adjust these sliders to customize the fit of your glasses.
- Once uploaded, this item will appear in your circle menu under Expressions/RGS. If you want to change where this item appears on your circle menu, then under the RGS-Pince-Nez prefab, click the Toggles object. In the inspector, click Edit In Prefab. You can change the menu path of every toggle to point to where you want (it automatically drops menu items under Expressions, so you only need to name the folder tree after that.)